How to make an origami angel
Origami Angel: try all 19 steps in the 3D player. Turn and replay every move. Print the complete diagram sheet or save it as PDF.
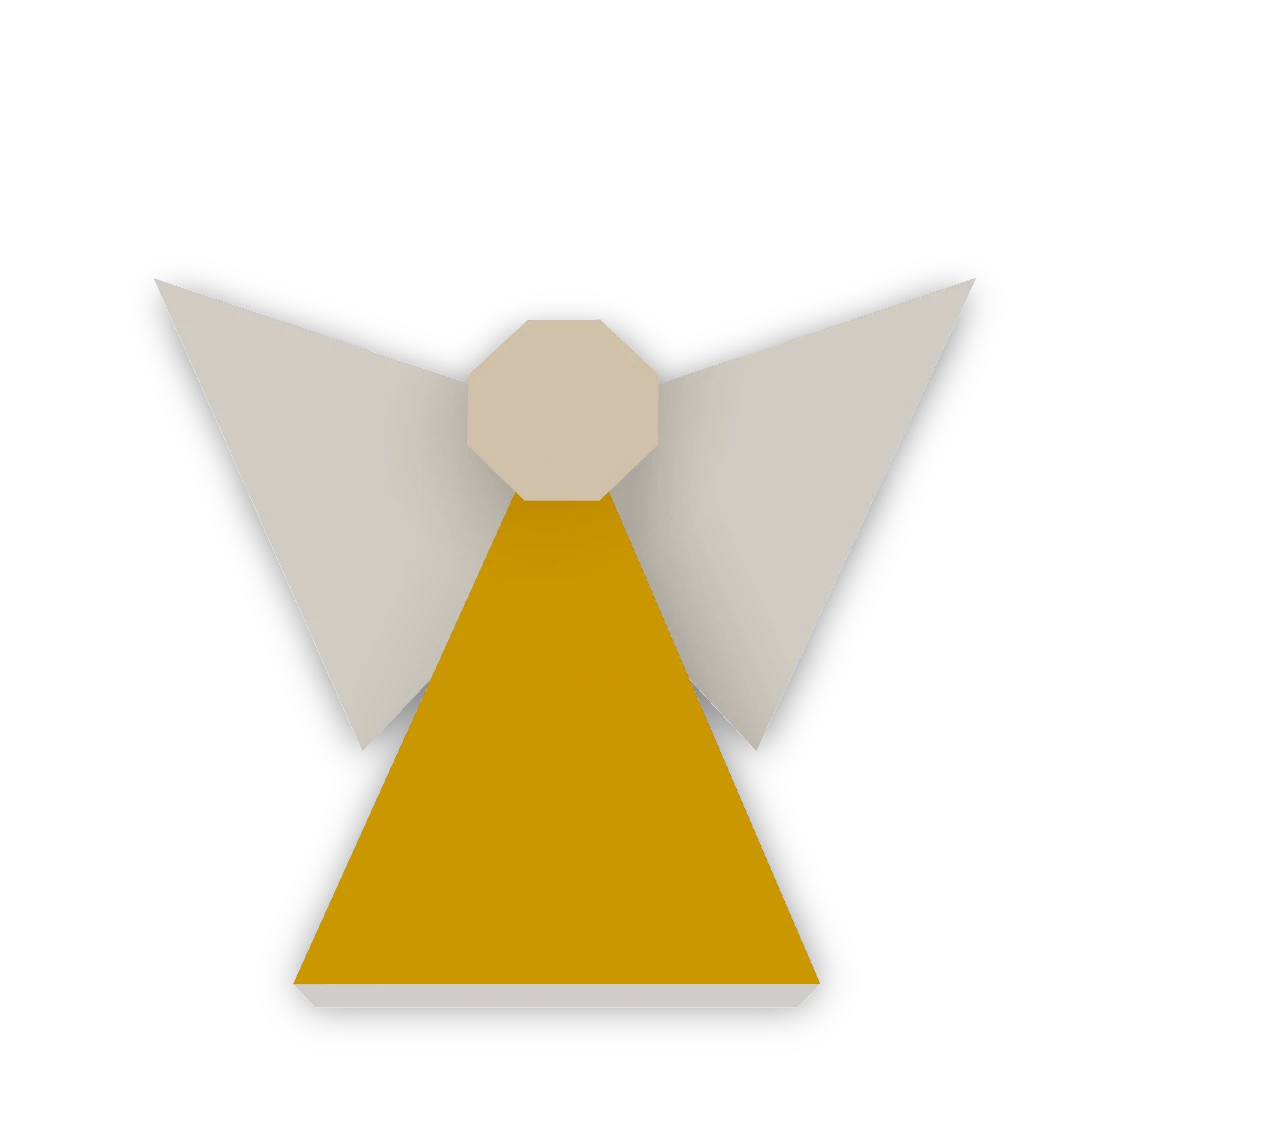
An Origami Tutor angel ornament with a long gold gown, a separate rounded head and two large white wings spreading from the shoulders. Fold four squares and glue their overlapping parts together.
- You need
- One 20 cm gold-and-white square, two 17 cm white squares, one 6.4 cm cream square, and glue. No scissors after preparing the squares.
- Start
- Use a 20 cm gold square with a white back for the gown, two 17 cm white squares for the wings, and a 6.4 cm cream square for the head. Start the gown white side up and the head cream side up, with a corner of every square pointing upward.
- Tips
- Match the two wings before gluing.
- Keep the head centered over the gown's middle seam.
Your model is ready
Let the glue dry. The angel is a flat ornament with a rounded head, a long gown and two wide wings. Add a drawn face or a hanging loop if you like. The finished angel ornament, upright with its head centered above the gold gown and its white wings spread from the shoulders.

Step-by-step diagrams
Steps 1–7
- 1
Fold the gown's left edge in
Bring the upper left edge to the vertical middle line, revealing the gold back.
- 2
Fold the gown's right edge in
Bring the upper right edge to the same middle line. The two gold flaps meet down the front.
- 3
Fold the hem behind
Fold the bottom point behind, leaving a narrow white band beneath the gold skirt.
- 4
Round the head's top corner
Fold this small point behind, about 1.3 cm in from the point. Keep the center flat. Four small folds make an eight-sided head.
- 5
Round the head's right corner
Fold this small point behind, about 1.3 cm in from the point. Keep the center flat. Four small folds make an eight-sided head.
- 6
Round the head's bottom corner
Fold this small point behind, about 1.3 cm in from the point. Keep the center flat. Four small folds make an eight-sided head.
- 7
Round the head's left corner
Fold this small point behind, about 1.3 cm in from the point. Keep the center flat. Four small folds make an eight-sided head.
Steps 8–14
- 8
Narrow the left wing on the left
Fold the upper left edge of the white square to its vertical middle line.
- 9
Narrow the left wing on the right
Bring the upper right edge to the same middle line, forming a long kite.
- 10
Fold the left wing's base behind
Fold the lower point behind along the line joining the kite's widest corners. This straight end will overlap the back of the gown.
- 11
Narrow the right wing on the left
Fold the upper left edge of the white square to its vertical middle line.
- 12
Narrow the right wing on the right
Bring the upper right edge to the same middle line, forming a long kite.
- 13
Fold the right wing's base behind
Fold the lower point behind along the line joining the kite's widest corners. This straight end will overlap the back of the gown.
- 14
Spread the left wing
Slide the straight base behind the gown's shoulder, with the long point extending up and out. Match the wing heights before gluing.
Steps 15–19
- 15
Attach the left wing
Put a small glue spot on the overlapping part behind the gown and press the wing in place. Leave the long point free.
- 16
Spread the right wing
Slide the straight base behind the gown's shoulder, with the long point extending up and out. Match the wing heights before gluing.
- 17
Attach the right wing
Put a small glue spot on the overlapping part behind the gown and press the wing in place. Leave the long point free.
- 18
Center the head above the gown
Set the rounded head over the gown's top point. The lower part of the head overlaps the narrow top of the gown.
- 19
Attach the head
Glue the small overlap at the bottom of the head to the front of the gown.
- ✓
Finish
Let the glue dry. The angel is a flat ornament with a rounded head, a long gown and two wide wings. Add a drawn face or a hanging loop if you like. The finished angel ornament, upright with its head centered above the gold gown and its white wings spread from the shoulders.
Fold next

Paper lantern ↗
The traditional flat paper lantern, with a wide middle and two rectangular ends. The same fold was called a muff or short-sleeved shirt in European kindergarten books.

Star ↗
An Origami Tutor eight-pointed star made from eight equal folded triangles. Every gold point is long and sharp, with a deep notch between its neighbours. Three folds make each ray; a little glue holds their overlapping bases together.
Paper Christmas tree ↗
An accordion Christmas tree with a pointed top, broad base and six pleated panels. Cut a triangle from a green rectangle, fold the pleats and open them into a zigzag decoration.
Christmas tree ↗
An Origami Tutor Christmas tree with three stepped tiers and a short trunk. Folded from one square of green paper with a kite fold and two pleats; no cuts or glue.