How to make a paper box from a printable template
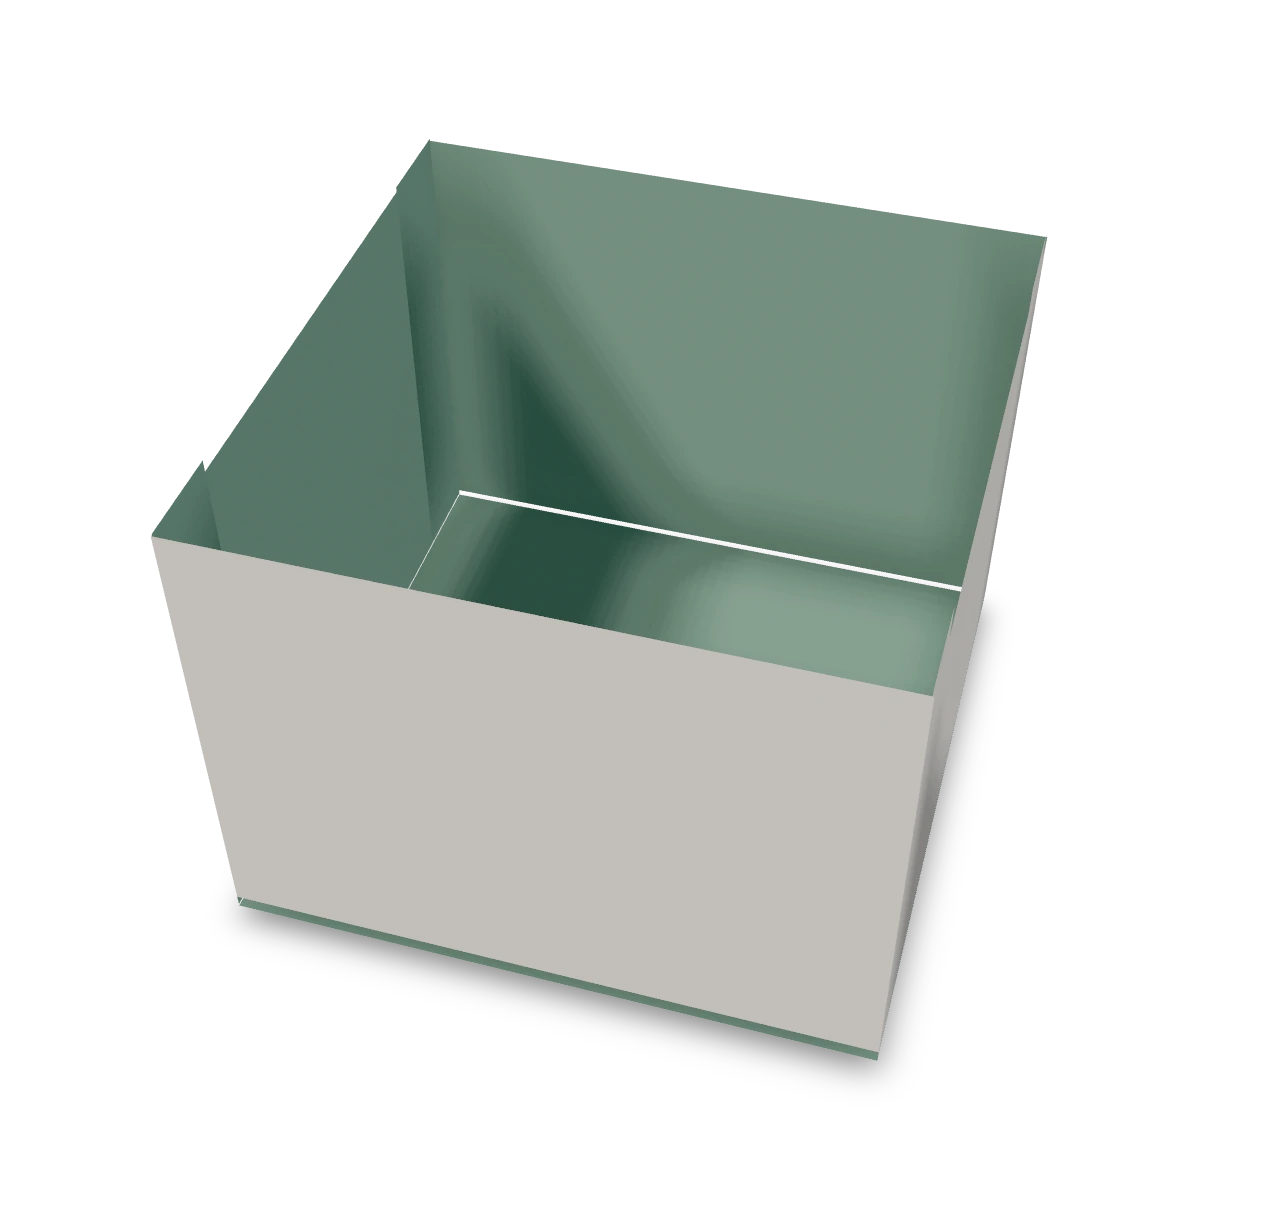
Make a Paper Box (Open Template): try all 5 steps in the 3D player. Turn and replay every move. Print the complete diagram sheet or save it as PDF.
Cut and fold a small open box with a 4 × 4 cm base and 3 cm walls.
- You need
- Light cardstock, scissors, a ruler, a blunt scoring tool and craft glue.Download the 12 cm box net ↓
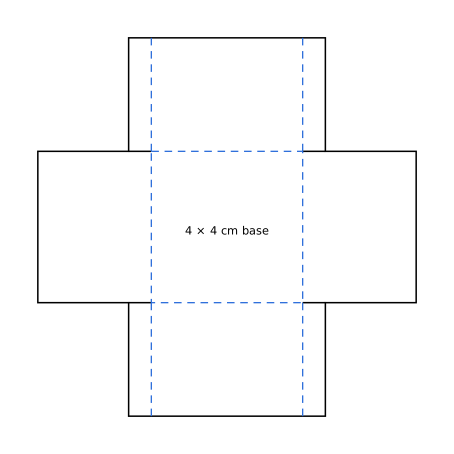
Print at 100%. The center square must measure 4 × 4 cm after printing.
- Start
- Start with the printed 12 × 12 cm net on light cardstock, colored side up. Solid lines are cuts; dashed blue lines are folds.
- Tips
- Cut the four short corner slits as well as the outside outline. They free the tabs from the neighboring walls.
- Score gently against a ruler. Hold the glued corners together until the adhesive grips.
Your box is ready
Let the glue set before placing a small, light object inside. The top stays open.

Step-by-step diagrams
- 1
Cut the net
Cut the solid outside outline. Make the four short cuts between the tabs and the side walls.
- 2
Score the folds
Score the four edges of the center square and the four tab hinges. Keep the card intact along these dashed lines.
- 3
Raise the side walls
Fold the two walls without tabs upward until they stand at a right angle to the base.
- 4
Raise the tabbed walls
Fold the other two walls up. Keep the four tabs free outside the neighboring walls for now.
- 5
Close the corners
Fold each tab inward against the inside of its neighboring wall. Add a thin layer of glue and hold each corner.
- ✓
Finish
Let the glue set before placing a small, light object inside. The top stays open.
Fold next

Tissue flower ↗
Pleat six tissue sheets, tie the center and lift the layers into a soft bloom.

Heart ↗
This heart stays flat, so it fits inside a greeting card or on the front of a folded note. The colored side makes the face; small folds hidden behind the left edge, right edge and two top tips soften the outline.

Square paper doily ↗
Fold a square twice into four layers, cut the square paper doily pattern, and open the creases in turn.

Round paper doily ↗
Fold a circle into eighths and cut an original lace pattern. Leave the central hub and the bands between the notches intact.