How to make a paper lantern garland
Paper Lantern Garland: try all 12 steps in the 3D player. Turn and replay every move. Print the complete diagram sheet or save it as PDF.
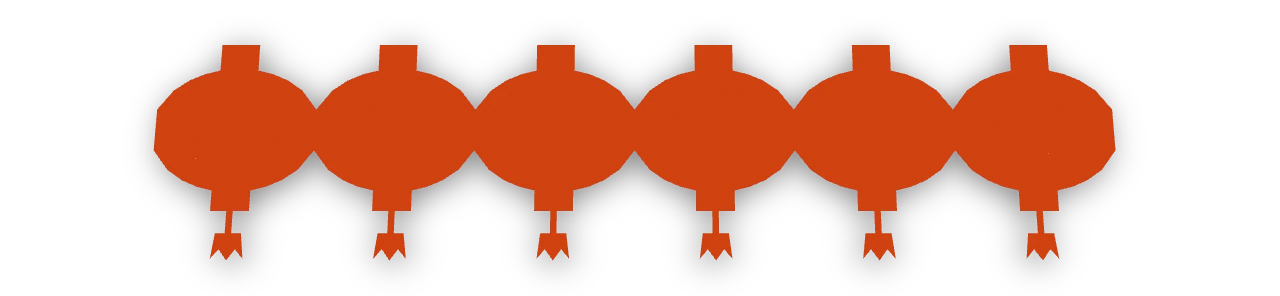
An Origami Tutor Lunar New Year garland: accordion-fold a red strip into six panels and cut one lantern with its caps and tassel through every layer, then open a string of six lanterns joined at their sides.
- You need
- Thin paper, a pencil, a ruler and scissors.
- Start
- Begin with one 36 × 9.6 cm strip of thin red paper. Mark six equal 6 cm panels along its length.
Your model is ready
Ease the creases flat. Lift the opened paper by an uncut edge to see the whole pattern. Hold the opened paper upright and flat, with the whole pattern.

Step-by-step diagrams
Steps 1–7
- 1
Fold panel 1 over the next
Measure another 60 mm panel. Fold the entire left packet over the paper to its right, lining up the edges. Keep all panels the same width.
- 2
Fold panel 2 behind the next
Measure another 60 mm panel. Fold the entire left packet under the paper to its right, lining up the edges. Keep all panels the same width.
- 3
Fold panel 3 over the next
Measure another 60 mm panel. Fold the entire left packet over the paper to its right, lining up the edges. Keep all panels the same width.
- 4
Fold panel 4 behind the next
Measure another 60 mm panel. Fold the entire left packet under the paper to its right, lining up the edges. Keep all panels the same width.
- 5
Fold panel 5 over the next
Measure another 60 mm panel. Fold the entire left packet over the paper to its right, lining up the edges. Keep all panels the same width.
- 6
Cut over the top of the lantern
Start on the left folded edge, about a third of the way down. Cut up and round the top of the lantern body, across the cap and down the other side to the right folded edge at the same height. Cut through all six layers.
- 7
Cut under the lantern and round the tassel
Start on the left folded edge, a hand's width below the first cut, and cut down round the bottom of the lantern. Cut out the lower cap, the cord and the fringed tassel, then back up round the lantern to the right folded edge. Leave a strip of paper joined at both sides.
Steps 8–12
- 8
Open pleat 5
Open this crease gently, leaving the earlier folds closed. Keep the uncut joins together.
- 9
Open pleat 4
Open this crease gently, leaving the earlier folds closed. Keep the uncut joins together.
- 10
Open pleat 3
Open this crease gently, leaving the earlier folds closed. Keep the uncut joins together.
- 11
Open pleat 2
Open this crease gently, leaving the earlier folds closed. Keep the uncut joins together.
- 12
Open pleat 1
Open this crease gently, leaving the earlier folds closed. Keep the uncut joins together.
- ✓
Finish
Ease the creases flat. Lift the opened paper by an uncut edge to see the whole pattern. Hold the opened paper upright and flat, with the whole pattern.
Fold next

Square paper doily ↗
Fold a square twice into four layers, cut the square paper doily pattern, and open the creases in turn.

Chinese window flower (chuanghua) ↗
An Origami Tutor window flower: fold a red square twice, make four cuts through four layers, then open a round flower with eight scalloped petals.

Fu blessing diamond cutout ↗
An Origami Tutor red diamond for Lunar New Year: cut the blessing character 福 through its centre one stroke at a time, by folding on each stroke and snipping half of it from the fold, then fold the diamond into a quarter triangle, cut a bead near each point and a round bite from each edge, then open it.

Fold-and-cut red lantern with tassel ↗
An Origami Tutor Lunar New Year lantern: fold a red square in half, cut a window and one outline through both layers, then open a flat lantern with two caps and a tassel.