How to make an origami kimono
Origami Kimono: try all 13 steps in the 3D player. Turn and replay every move. Print the complete diagram sheet or save it as PDF.
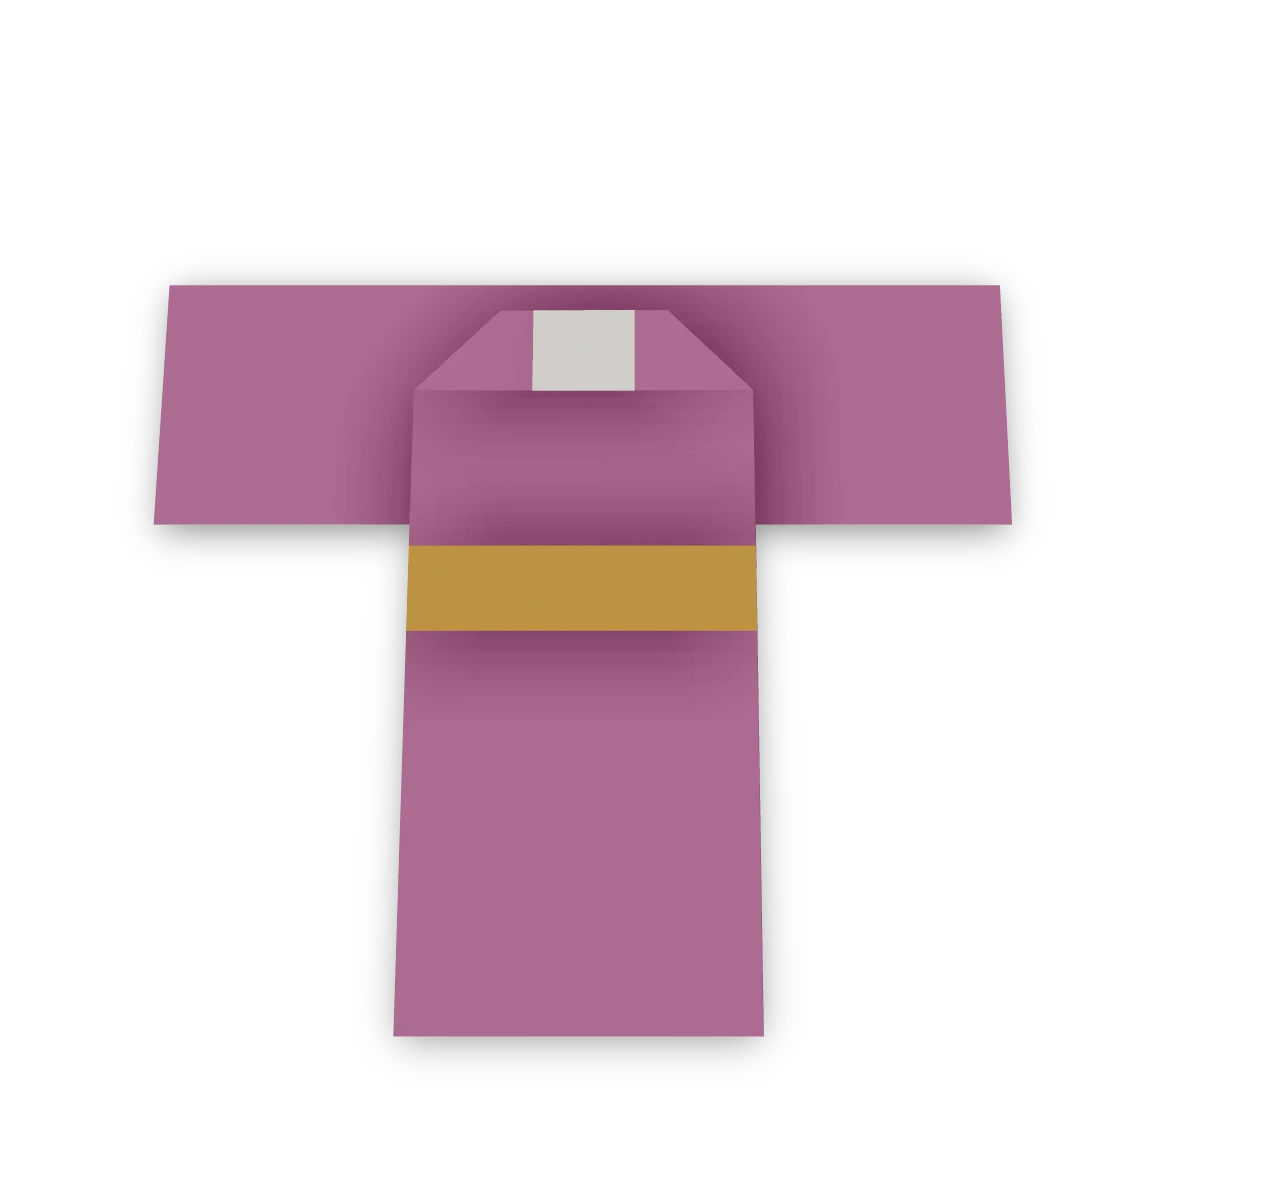
An Origami Tutor kimono ornament with wide hanging sleeves, a pale folded collar, a long robe and a contrasting obi. Fold three pieces and glue them together for a flat display.
- You need
- One 20 cm square, one matching 20 × 12 cm rectangle, one contrasting 8 cm square, and glue. No scissors after preparing the pieces.
- Start
- Use a 20 cm square for the body, a matching 20 × 12 cm rectangle for the sleeves, and an 8 cm square in a contrasting color for the obi. Start the body colored side up and the other pieces white side up.
- Tips
- Center the sleeve panel before gluing.
- Use matching paper for the body and sleeves and a contrasting color for the obi.
Your model is ready
The kimono ornament is complete. Keep it flat, with the wide sleeves clear of the long lower robe. Let the glue dry before displaying it. The finished three-piece kimono ornament, upright with its collar, wide sleeves, obi and long straight robe.

Step-by-step diagrams
Steps 1–7
- 1
Turn down the collar edge
Fold the top edge down 1.2 cm, showing a narrow white band.
- 2
Narrow the left side
Fold the left side behind, along a line 6 cm from the left edge. Keep the pale collar at the top.
- 3
Narrow the right side
Fold the right side behind along a line 6 cm from that edge. The long front is now 8 cm wide.
- 4
Fold the left lapel
Bring the upper left corner inward along a diagonal from the collar's middle to a point 4 cm down the left edge.
- 5
Fold the right lapel
Fold the upper right corner in to match. The small pale folds meet above the robe.
- 6
Flatten the neckline
Fold the small pointed peak behind along a horizontal line 3.2 cm below the original top edge. Leave the pale lapels visible below the new level neck.
- 7
Double the sleeve panel
Fold the rectangle's top long edge down to its bottom edge. Keep the colored side showing and the long fold at the top.
Steps 8–13
- 8
Double the obi
Fold the small square's top edge to its bottom edge.
- 9
Make a narrow obi
Fold its top folded edge down to the bottom edge again, making an 8 × 2 cm band.
- 10
Set the sleeves behind the robe
Center the sleeve panel behind the upper robe. Its folded edge sits just below the collar, with the same length of sleeve extending at each side.
- 11
Secure the sleeves
Lift the robe just enough to add a small glue spot where it overlaps the sleeve panel. Press the two pieces together, keeping the sleeve ends free.
- 12
Lay the obi across the waist
Lay the narrow band across the front, just below the hanging sleeves. Its ends line up with the robe's sides.
- 13
Secure the obi
Put a small glue spot on the back of the obi and press it across the front of the robe.
- ✓
Finish
The kimono ornament is complete. Keep it flat, with the wide sleeves clear of the long lower robe. Let the glue dry before displaying it. The finished three-piece kimono ornament, upright with its collar, wide sleeves, obi and long straight robe.
Fold next

Yakko-san ↗
The traditional Japanese paper figure: a pointed head, two broad sleeves and a short lower flap, made from alternating corner folds.

Hakama trousers ↗
A flat pair of broad paper trousers with a folded waistband, two separate legs and turned-up cuffs. This Origami Tutor cut-and-fold design uses one square; it is our paper-doll adaptation rather than the traditional triple-blintz hakama sequence.

Shirt ↗
The traditional square-sheet shirt or jacket with two downward sleeves. Folded from alternating corner blintzes with rectangular sleeves and a neat collar.
Fukusuke ↗
An Origami Tutor Fukusuke figure with broad robe sleeves, a seated lap and a smiling pen face, adapted from the simple blintz-and-kite folk form.